Homebrew Pinball #3, Part 55

Cross posted from the original Pinside thread, this is one of many posts regarding my third homebrew pinball machine, creatively nicknamed 'P3'


Using my flatbed scanner, I scanned the whole playfield in, since this is probably my only chance to access it completely flat

I'm hoping that I can stitch these together and use them to update my CAD drawing to match the hand-changes I made when assembling, though I've heard mixed results about how accurate this can be...

Then I put down my sheet of plastic, which I think is 1/32 lexan, and started marking holes for posts.

The main worry with this plastic is whether it'll bubble and expand, separating from the wood, which I've seen happen when trying to make playfield protectors. This is a bit thicker though, and lexan, not PET-G; I'm hoping one of those two factors will fix that issue. To test it, the best thing I could come up with is just to heat it up for a long period of time, so I set it up with a bunch of incandescent lamps pointing right at it, for lack of any better options

I'll leave this on all day, and see if the plastic rises up anywhere. If not, I'll proceed with cutting the rest of the holes+slots, and reassemble the game for further testing. Not sure if I'll also cut the hole for the screen at this point, or play it some with the protector first before going 'all in' and cutting a 10" hole in the playfield.

Posted Tuesday, November 16, 2021
at 10:16 AM


Tags: Blog Post, Pinball, Project, P3,

Homebrew Pinball #3, Part 54

Cross posted from the original Pinside thread, this is one of many posts regarding my third homebrew pinball machine, creatively nicknamed 'P3'


Game is getting increasingly hard to play due to the lack of a screen, so I decided it was time to bite the bullet and try installing the plastic sheet, which means I need to strip the whole playfield. Took it out of the cab for the first time in a while

In some places, I'm glad that past-me thought ahead and installed connectors
In other places, like the wires going to the trough mechs, I wasn't that smart, so I ended up cutting the wires, and I'll install a connector later. A few mechs I left hanging, since I didn't think to put connectors on them, and now they're wired in such a way that I can't easily add them.

Tear down went pretty quick and painless. There's not that much on top of the playfield, and all the drops have connectors so they're quick to remove.
The biggest pain was all the standups. They didn't get connectors either since they're so scattered, and some of them barely fit through the playfield. In a few cases I actually assembled them through the playfield to begin with, so I needed to disassemble the target again to get it out.

The paper has held up pretty well to being played on over and over.

When I first installed it I worried that the ball would rip it up when I started flipping but there's no tears at all, even in high traffic places.

I moved all the playfield components to a spare sheet of cardboard to keep track of them:
I wasn't very consistent about screws, posts, etc when assembling, and in some cases I even had to do stuff like grinding down plastic posts to make them shorter, so you really can't mix and match anything, and keeping it all straight like this is really important.

Taking off the paper reveals about what I'd expected: a ton of trapped sawdust everywhere. It's been messing with the ball and getting it stuck in places it seemingly shouldn't

It also reveals something I hadn't anticipated; the wood around every screw is slightly ripped up and standing above the playfield
I'm not sure if this is just normal, or if it's caused by me screwing everything in without drilling pilot holes. Luckily these sanded down easily without affecting the finish of the wood at all

With the playfield all torn down, next I'll need to start cutting the plastic

Posted Tuesday, November 16, 2021
at 10:16 AM


Tags: Blog Post, Pinball, Project, P3,

Homebrew Pinball #3, Part 53

Cross posted from the original Pinside thread, this is one of many posts regarding my third homebrew pinball machine, creatively nicknamed 'P3'


Installed a tilt bob, which had to go on the right side due to how I'd routed the wiring, etc. Even in this position I'm still going to need to trim the rod some to keep it from catching on stuff. Plus I need to earplug it!

With that installed, I realized I still had no way to kill power to the flippers, so I installed some relays too. Now the tilt works properly in game, and the flippers also aren't energized when there isn't an active game.

While opening the game to check on something, I noticed I had four pinballs piled in the front left corner of my cabinet. Occasionally, balls hit by the right outlane saver will airball over the lower left flipper/guide and fall down in there, and rather than grasping around for them I just grab another ball

So I set up an airball catcher, made from scrap lexan and attached to the existing ball guide

In order to get the height right, I also had to put the glass back in, which was a problem since I didn't have any siderails. I dug a pair of stern side rails (from replacing with lollipop rails) out of my spare parts, and they seem to fit the williams cabinet fine. Eventually I'd like to get proper williams rails on there, but I need to get the secondary holes for the extra flipper buttons, so that's been on the backburner. Since the stern rails are narrower, they fit above the buttons fine.

My lockdown bar is also still covered in rust, so I grabbed one from my whirlwind for now, and for the first time actually had the game assembled with glass+lockdown bar. It's surprising how much of a difference this makes. The game feels much more like a 'real' game. A lot of the noise gets quieted down, which also makes the gameplay feel smoother. A big improvement, although I still need to get a coin door skin somewhere...

With the mechanisms quieted by the glass however, it becomes much more obvious that I don't have any sound effects! I think this is going to be a big focus soon; I need to start finding (or recording) sound effects and callouts for everything. I'm not really sure how I want it to sound either. Most card themed pinball machines are EMs, and the solid state ones fall into that weird early 80s state where the only sound effects that could be generated were laser blasts and explosions (Eight Ball Deluxe always stood out to me for this). By the time sound designers were free to use any sound effects they wanted, poker themes weren't really popular. I think the only two games that'd fit that category are High Roller Casino and World Poker Tour. For better or worse, the sounds on those have never really stood out to me, to the point where I can't actually remember what they sound like to use as a reference. For a while I was tempted to stick a chime box in this game and call it done, but I'd like to try to get some actual sound effects in.

For now, I think I'm going to try to make all the sound effects be related to actual poker. Chips clinking, cards being shuffled, etc. Not a ton to work with but maybe it'll be enough. Not sure how that'll feel as a pinball game either though....

Posted Tuesday, November 16, 2021
at 10:14 AM


Tags: Blog Post, Pinball, Project, P3,

Homebrew Pinball #3, Part 52

Cross posted from the original Pinside thread, this is one of many posts regarding my third homebrew pinball machine, creatively nicknamed 'P3'


After more playtesting, I decided that it was too hard to catch the ball. With a game where not hitting the wrong things can be as important as hitting the right things, players need to be able to get some control. Even I was having trouble with this, and would often have the ball roll off the end of the flipper while trying to catch it, which I think is partly due to how steep my flippers are (at rest), and thus how shallow they are when raised.

When I originally designed the game I tried to copy the layout of my Alien Star, but I messed up somehow, and part of that was that I put in my flippers too steep. A while ago I picked up a spare gottlieb inlane guide, so I stuck this in my printer and took a scan:

measuring that picture, I got an angle of 119 degrees (probably 120 in reality since that's a nice number...), while my layout was 126 degrees (fun fact, williams inlane guides are 125, so I somehow mistakenly made williams inlanes...). So I made a new inlane guide with a 120 degree angle:https://cad.onshape.com/documents/cf8933508c54fdc1d2e1cbec/w/8de46f8a59b2e2a9657a1015/e/ce2603cfd473c1490421177c

Installing it on the playfield made it look way more dramatic than it was, with the giant gap between it and the slingshot:

But the actual difference in the flippers was pretty reasonable:

So I went ahead and adjusted the left side as well, and moved the slingshot down to compensate

You can see from the old lines and holes how much stuff moved... I'm ending up with a lot of holes in my playfield! When I try to make the plastic for this, I'm going to have to be careful to note which holes are 'current' so I don't use the wrong ones when reassembling.

Posted Tuesday, November 16, 2021
at 10:14 AM


Tags: Blog Post, Pinball, Project, P3,

Homebrew Pinball #3, Part 51

Cross posted from the original Pinside thread, this is one of many posts regarding my third homebrew pinball machine, creatively nicknamed 'P3'


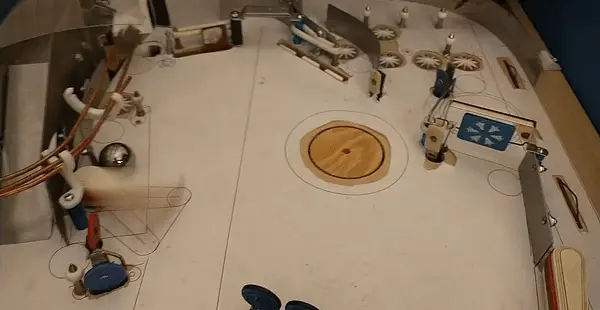
For the second aspect, I wanted to see whether the shot behind the pop bumper could be made if you removed the pop bumper. So I took out the pop bumper:

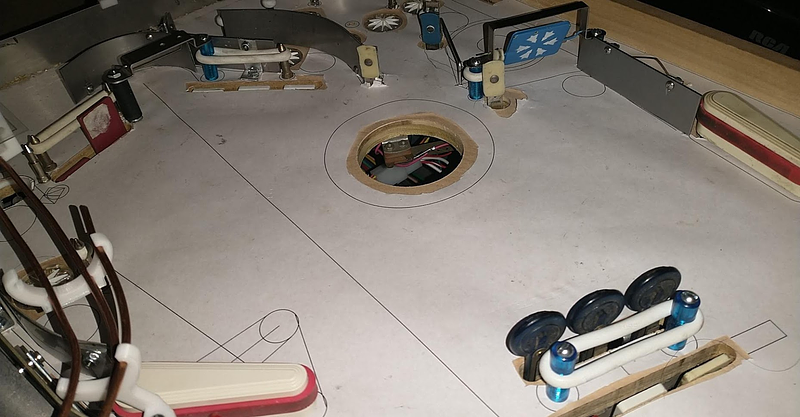
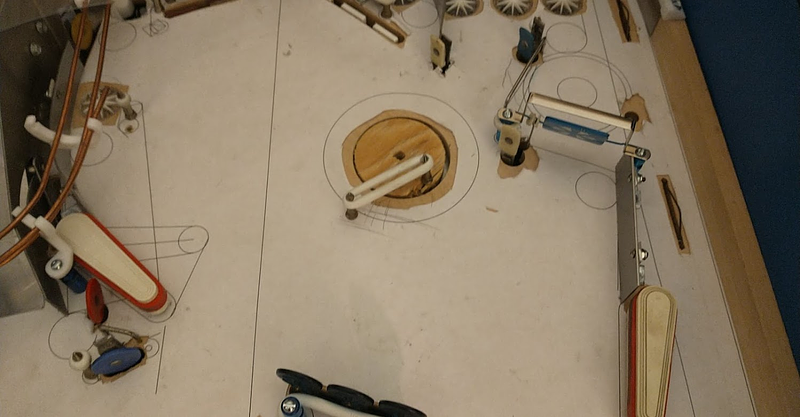
Gobble hole? No, I need to fill it. What do I fill it with? Well, lets just cut another hole with the hole saw and save the piece


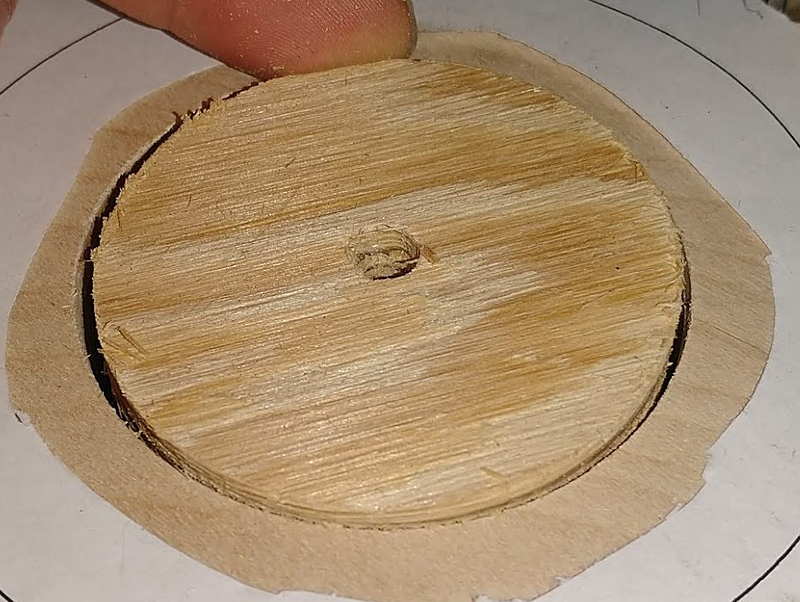
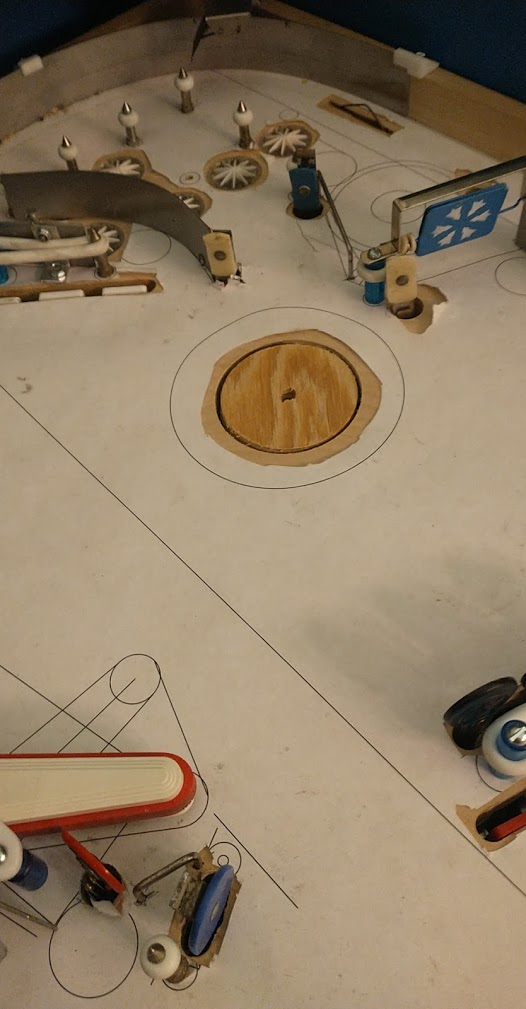
Not a perfect fit, but for testing it works better than expected.

Now... Can you shoot into that area to the right of the back lane?

No problem!

Originally I was going to consider redesigning the lanes area to add another 'shot' here if this angle worked, but I realize there's already a handy blue target right there, that can no longer be hit by the pop bumper, so I don't really need to design any new shots. Just add an arrow insert pointing at that target and make it a jackpot or something, and it goes from 'least useful target in the game' to 'major shot'. Considering the amount of work necessary to redo this area to use two shots instead, I'm inclined to just go with the four lanes from the previous approach and this 'shot' here.

Now for the last bit, should I put something where the pop bumper was? I did a bunch of test runs, dropping the ball from each of the upper lanes, rolling it down the metal guide, shooting it from the upper right flipper, to see exactly where the ball traveled, what angle it was going at, etc, and then took a deep breath and installed two posts.

This is another case where I hate trying to place stuff, since getting these two posts positioned at the proper location and angle to get the bounce I want could take a lot of trial and error, leaving my playfield filled with holes, but I don't really have any better ideas on how to approach it. Originally I'd hoped that both ends of the rubber would be located on my disk I installed, so I could just replace it if necessary, but it was clear from my drop tests that at least one end would need to be on the playfield.

Now... does it work?

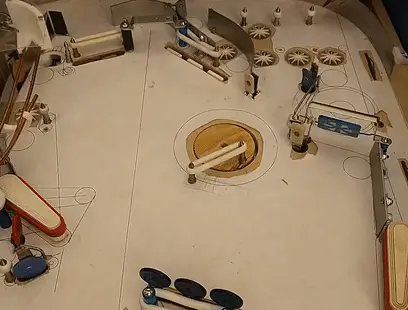
Success! I'd like it to feed a bit higher on the flipper, but proof of concept is working good. I think eventually it'll need be lowered a bit (but not so low that it obstructs the right flipper's path to the upper scoop. A bit of nudge when the ball lands on the rubber should help too. Before fine tuning further I'm going to play the game more and see how this affects other parts of the game, but throwing it around by hand it seems to be working generally how I'd like:

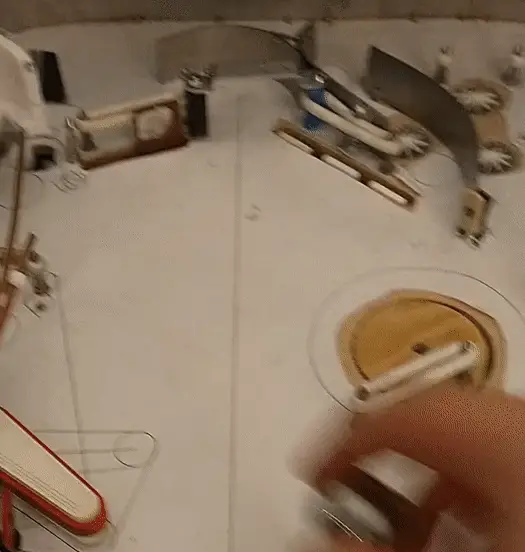
I had also planned to maybe put a standup behind this rubber to be hit by the right flipper, and it looks like from a very early shot you can hit the bottom edge of the rubber, so that does look possible, but I'll wait to do that until I'm sure I like this rubber and its placement. I might also experiment with alternate coil stops/etc on the right flipper to make it shoot at a higher angle.

Posted Tuesday, November 16, 2021
at 10:13 AM


Tags: Blog Post, Pinball, Project, P3,

< Newer Posts
Older Posts >

Posts per page: 5 10 25 50 100