
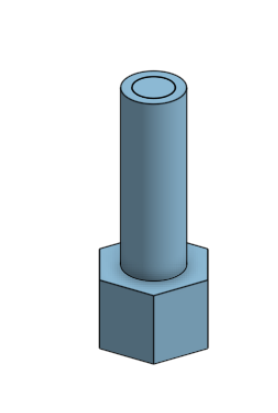
Had ideas floating in my mind as I went to bed last night, so I spent labor day turning my 3d printed down-post:
Into this: 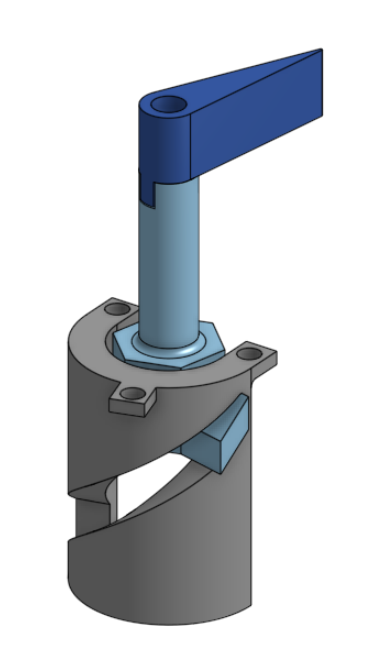
(experiment! can you see this in 3d here? https://cad.onshape.com/documents/e14cc6f13a9ec312b7e371b0/w/a5bf5ad363bb92618999d587/e/dd1e5e8e912c1fee6b05a354)
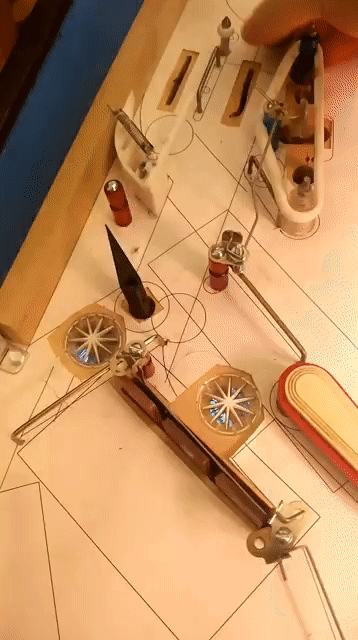
It mounts in a standard slingshot bracket; when the coil energizes and pulls the plunger (which attaches to the bottom of this part) down, it also spins around about 120 degrees in its channel.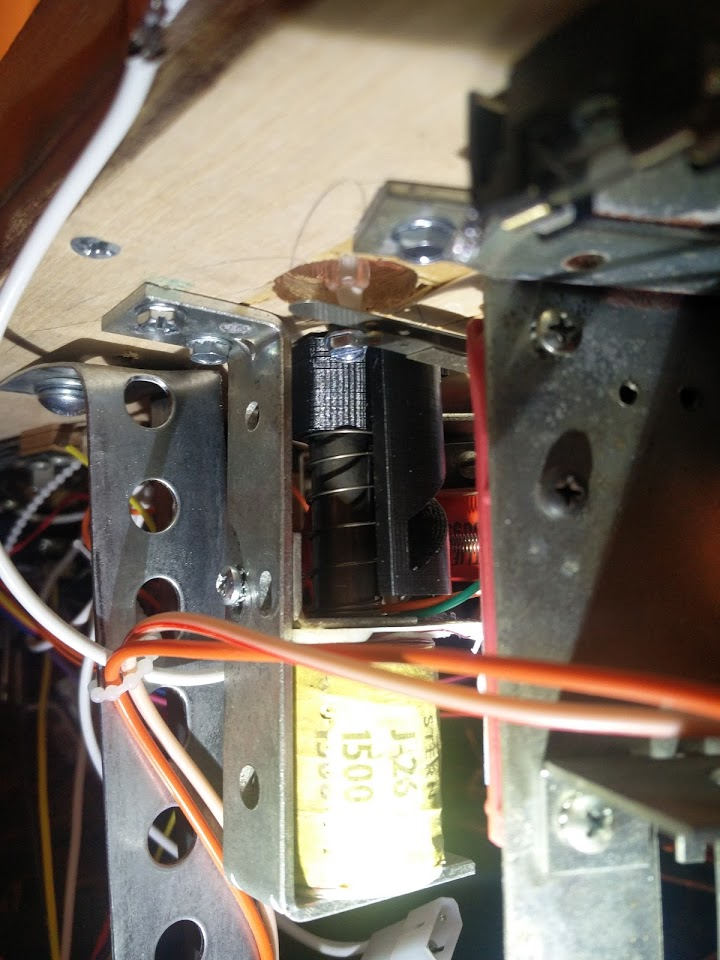
The thing fits in about the same area as just the coil (and could be made smaller too, but I sized it around the hex base which is 9/16 for easy mounting with a wrench), so there's no clearance issues compared to the plain post that was there before.
I had to rearrange things slightly since the existing post+hole wasn't in the proper position for a gate (which would optimally be right above the wire guide, but in the end it works since it also gives me more room to bounce the ball around a bit, giving the player more reaction time, which was another goal I had when reworking this area. 
Will have to give it some more playtesting to make sure it holds up well... In the long term I'd redesign this area a bit further around this new mechanism. The two rollovers aren't needed anymore, since it's basically impossible for the ball to go the wrong way which also means two switches saved (I think my matrix is nearly full), two less cuts needed to be made in the playfield (and the eventual plastic cover). The post can be moved a tiny bit closer to the drops below. I can use a shorter metal rail since I don't need to have it extend up to work with the up-post, or maybe a small custom-cut guide can be made to fit below the post and provide a smoother transition to the outlane. Instead of the temporary red post I added on the left, I can shape the inlane guide above it to fill in that area.
It took about 12 prints over 10 hours to get everything right since I didn't really plan this out before hand, and didn't know what measurements I was working with, but in the end it's working smoother than I expected, so not bad for a day's work
blog comments powered by Disqus