Cross posted from the original Pinside thread, this is one of many posts regarding my third homebrew pinball machine, creatively nicknamed 'P3'
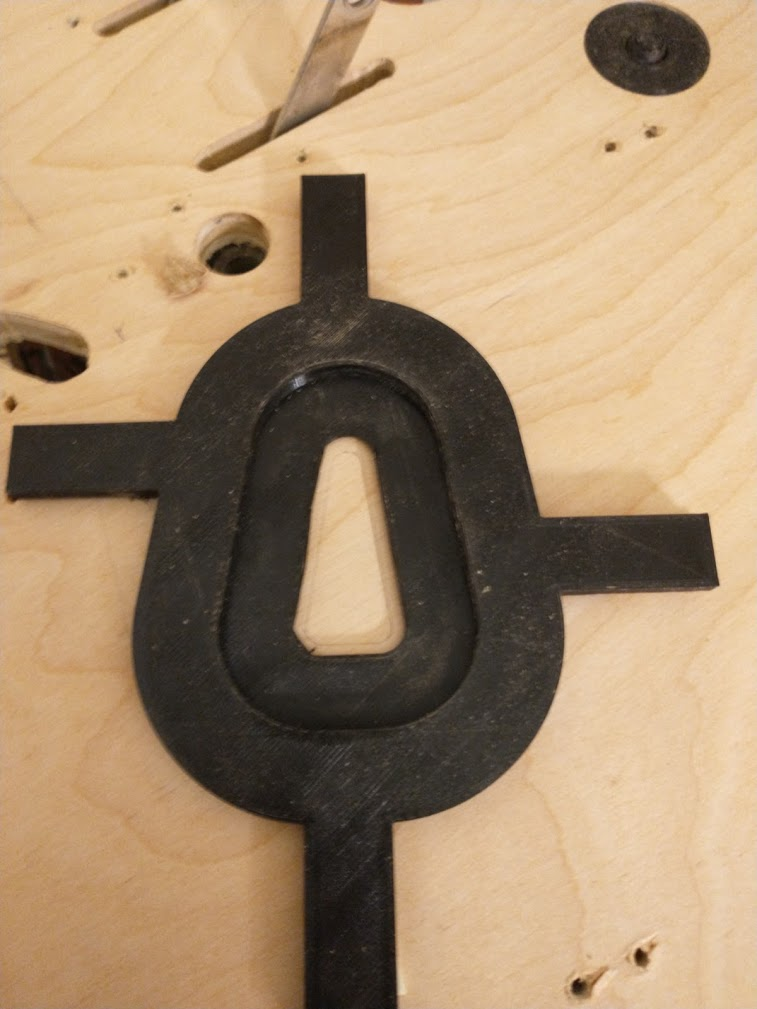
Since I had the playfield torn down, I figured I might as well install the inserts too. I've got a big bag of random inserts I've collected over the years from different stores, so I started laying them out. 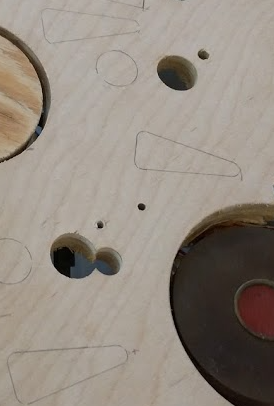 To keep things simple, I used one size of arrow (1.5" triangle) and three circles. I think the circles can probably be done with a forstner bit, but the arrow will need to be done with a router. Taking some advice from
 ![]() Johnsonvillebrat, I designed a guide for my router
Johnsonvillebrat, I designed a guide for my router 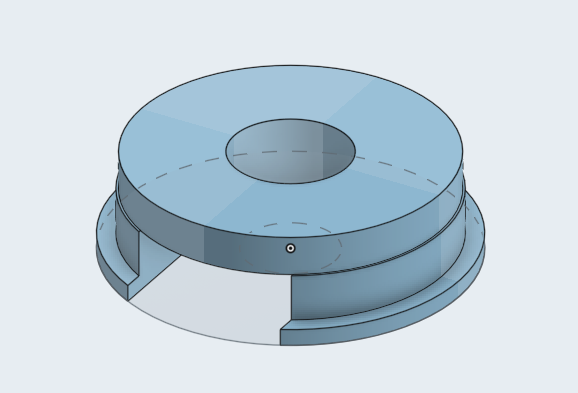
and a guide for the shape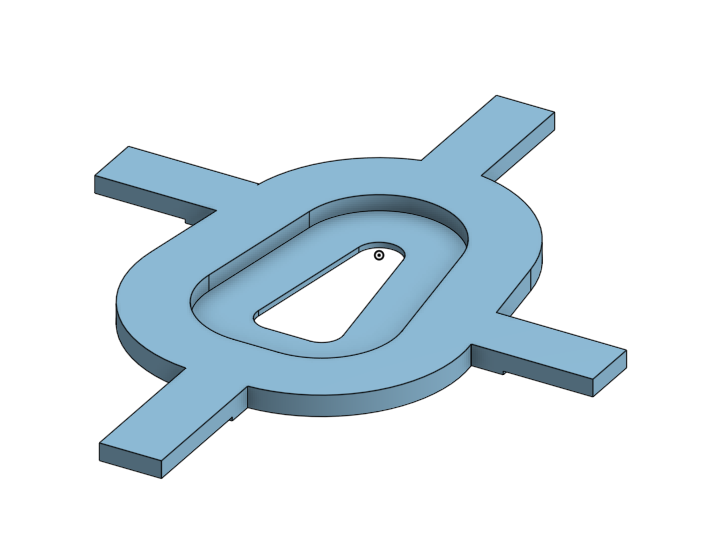
It took about 10 tries to get the guide just right for a snug fit (a big pain, since each print took 3 hours!) but I eventually got it just right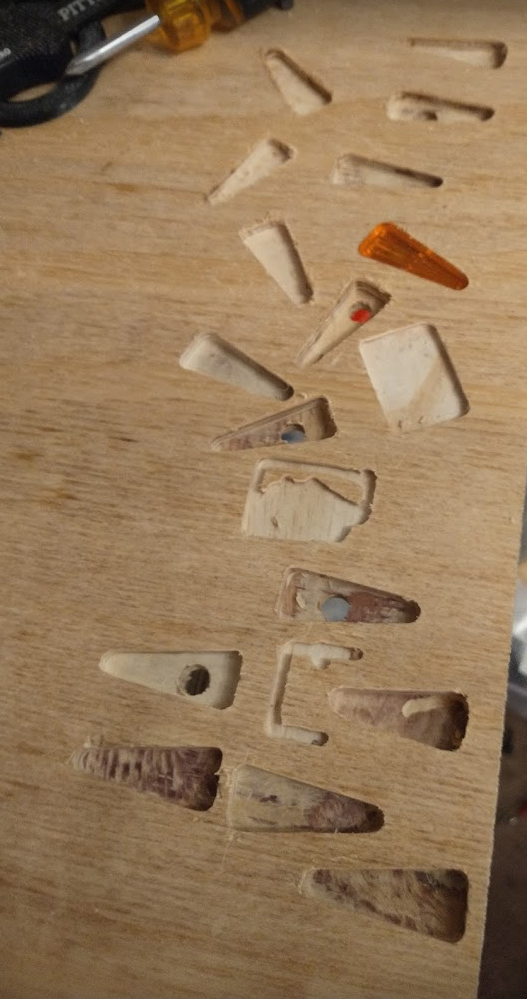
and made my first cut in the playfield
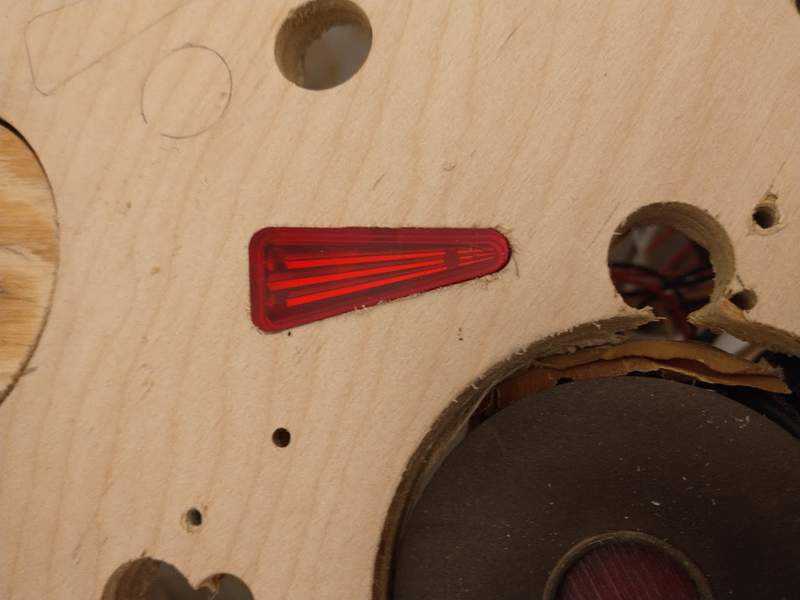
....aaaand immediately ran into an issue.
Can you spot the difference between these two arrows? 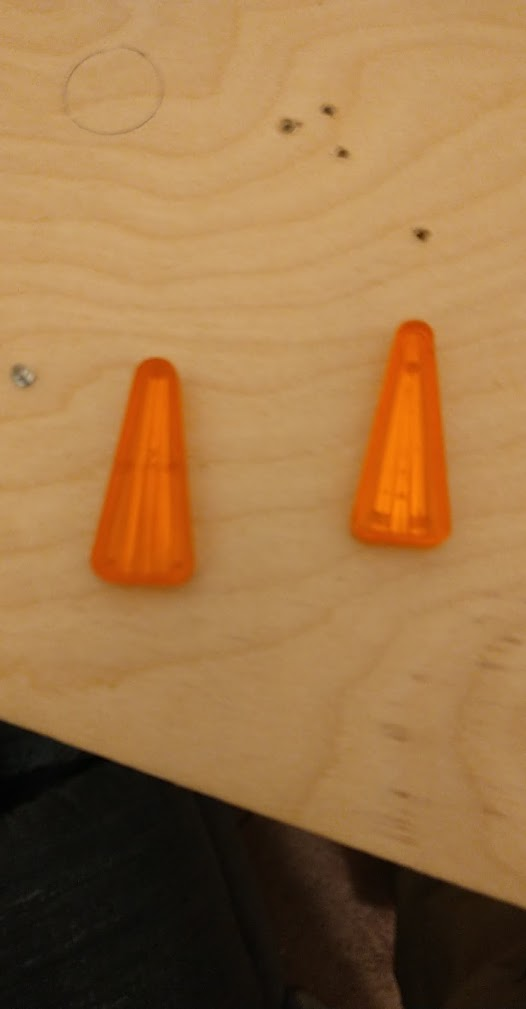
One is wider at the tip! I sorted through my inserts and found out that half of them won't fit the guide I made, which also means I don't have enough of the correct inserts for the playfield. I was planning on making them all clear, uncolored, for RGB lights, but I don't have enough of those. So I went to order more.
...aaaaand no one stocks them! (unless I want to pay $5 each shipped from europe) What? A transparent arrow should be like, one of the most common ones needed. Pinball Life (who has a great selection of inserts for homebrew) has six colors... but no clear. And they don't have any plans for restocking. The best I can find is that PBR has some opaque white inserts available, but I'm not sure how that'll look since every modern game I know of with RGB lighting uses transparent.
Luckily, I had one of those in my assortment, so I figured I'd stick it over an led and see how it compared.
...which made me realize I have no RGB leds. In fact, I have no real plan at all for how to light all these inserts! Back when I was first planning out this electronics system years ago when RGB was still a bit new, I figured I'd just get some 4-legged RGB LEDs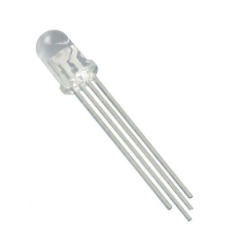 , and then just stick them in a matrix. Except I don't have any boards designed to drive a matrix. And after wiring up the switch matrix, I really don't want to wire up another whole matrix with double the wires. It seems like today everyone is using NeoPixels and other individually addressable, chainable LEDs (well, besides stern, but), so I started looking into what'd be the cheapest, easiest, least messy way to get some of those installed. Luckily when I designed my MPU I added a spare connector for the 3 extra unused GPIO the RPi had, and I made sure that one of those was the DMA pin that's commonly used to drive these LEDs from a Pi, so I think I can drive them. If not I can get a FadeCandy or something. It seems like a lot of people are just buying FAST's individual LED boards, but they're $1.50 each, and need wiring to connect them all. So I ordered 5 meters of addressable LED strip (150 LEDs) off eBay for $15, and some mounting clips for $5. I'm hoping I can just string this through the playfield to reach all my lights, and use the spare LEDs in between as free wiring (just don't turn them on). Maybe that'll work, or not. I can always find a use for 5M of LEDs at worst though.
In the mean time I've also ordered a bunch of opaque white inserts from PBR, since they're cheap and I needed some other parts anyway. Hopefully they light up well. Maybe the opaque inserts will give it a more retro feel? Of course, I don't know if the random opaque triangle insert I had lying around is from PBR or not, so cutting (and thus, reassembling) the playfield needs to go on hold for now until the order arrives so I know whether I need to design a new router guide ![]()
Cross posted from the original Pinside thread, this is one of many posts regarding my third homebrew pinball machine, creatively nicknamed 'P3'
Ran a test cut of one 4x5" area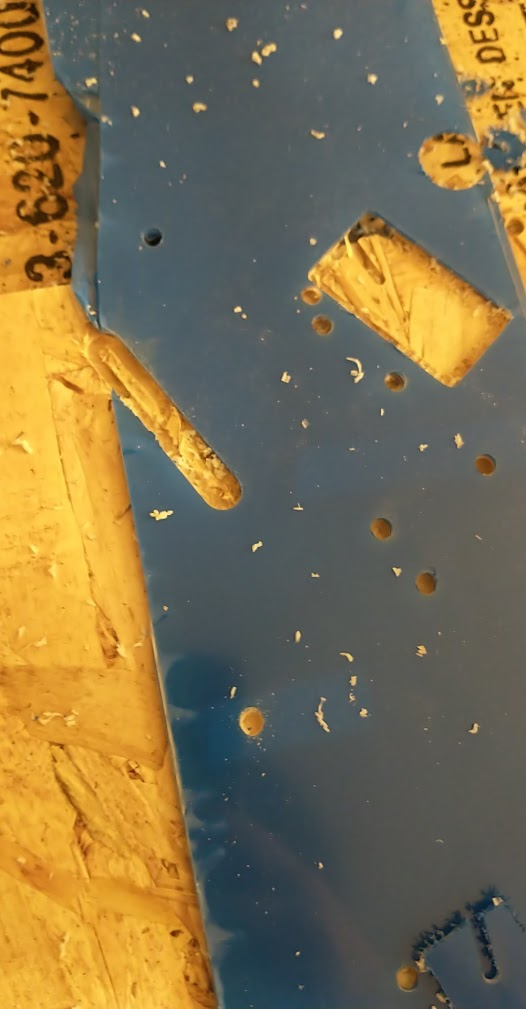
It turned out fine, no obvious issues. 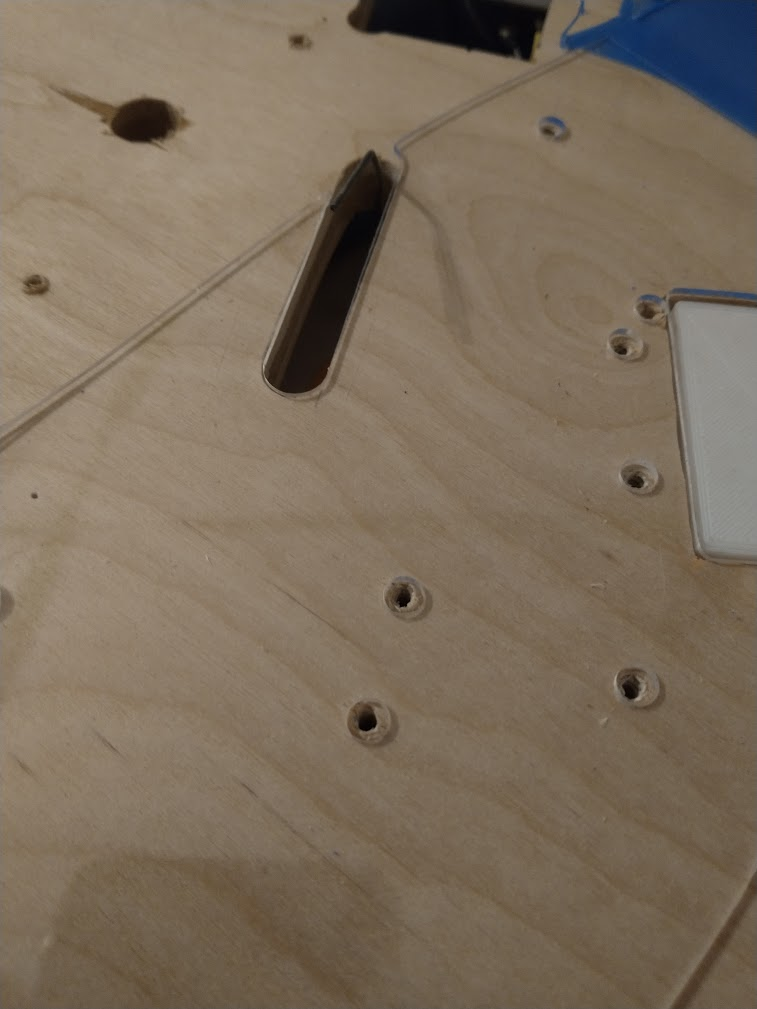
so I went and did the whole thing. I took one of my rough manual cuts, and stuck it down with a bunch of double sided tape. In retrospect I should have used thinner tape, as during the cut I could see the plastic flexing downward before the bit broke through, but it doesn't seem to have caused any issues with the cut.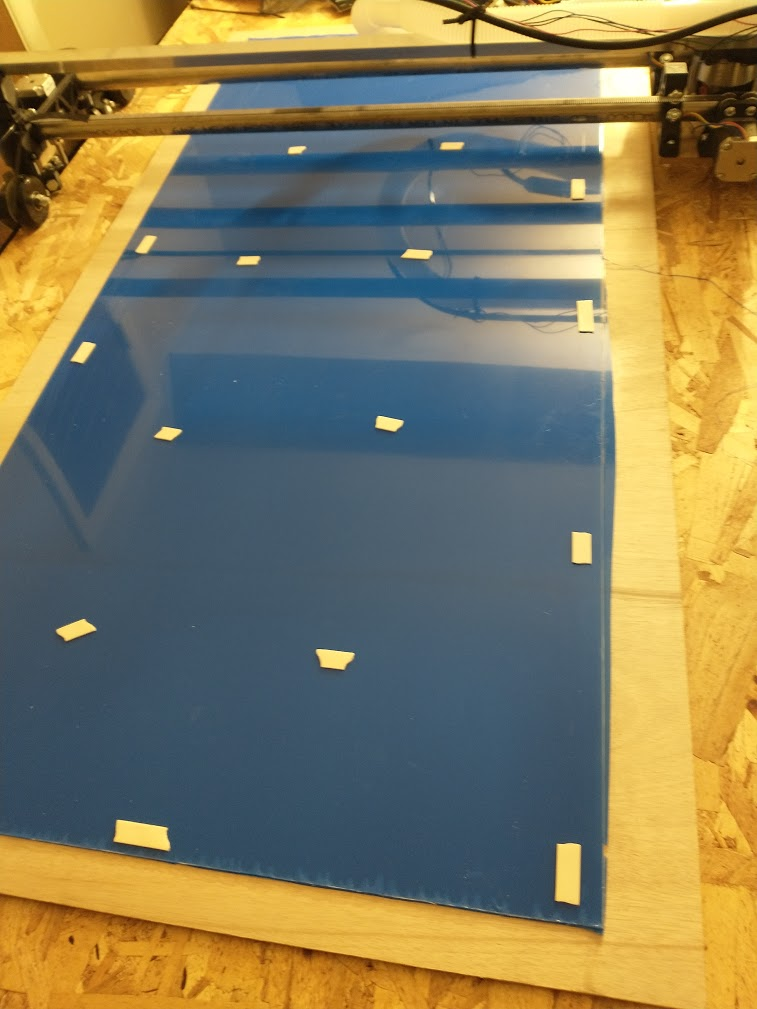
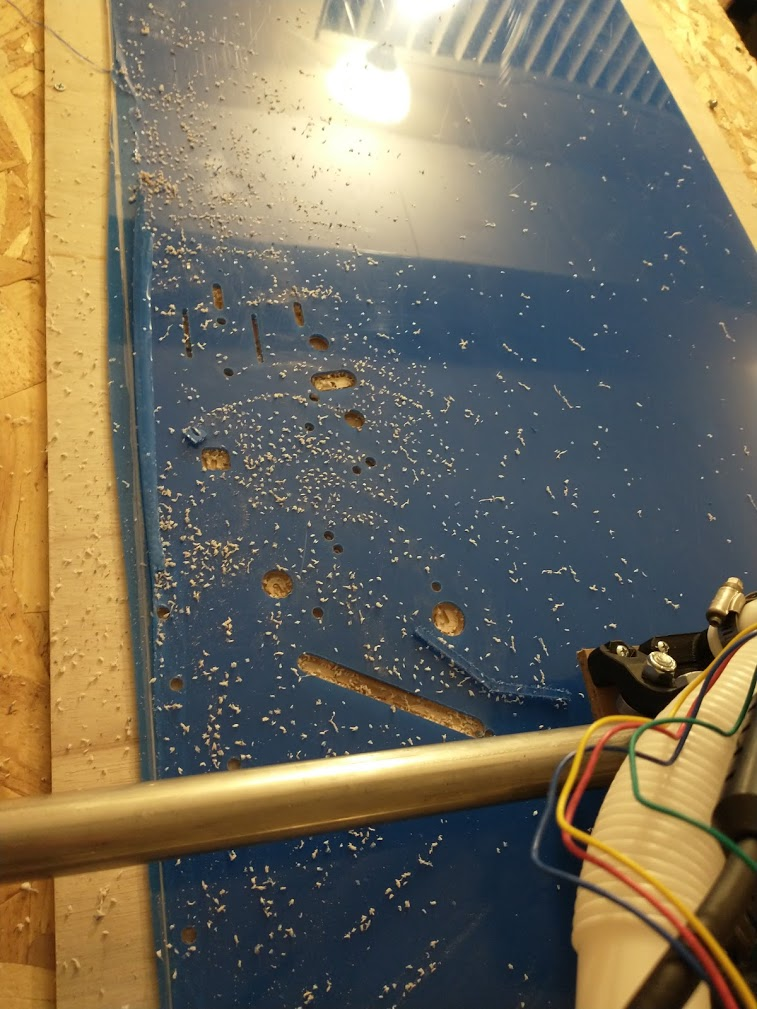

My first time running a real job on the CNC, probably took about 40 minutes. Plastic seems to have come out fine, and it at least fits on the playfield.
 Most of the holes are off center, but not outside the margin of error (I made every hole bigger than needed).
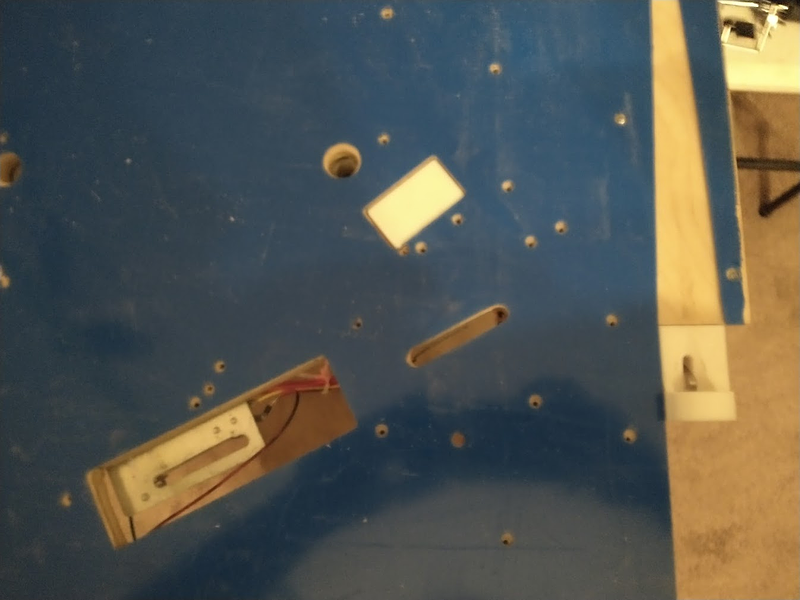
 There's a few places that need some correction, so I need to figure out how to do that. Aligning the plastic perfectly was a big pain, I don't think I could reliably get it matched up again. But I want to avoid doing stuff 'by hand' for risk of cracking the plastic. Maybe I'll need to use the router manually? Or try to run the CNC with manual control. Before I bother with any of that though, I should probably secure this down again and do some more heat tests.
I went in multiple times to try to do the corrections to the layout, but something just wasn't making sense. The corrections weren't all in the same direction, but different parts of the playfield tended to all need correcting in the same direction, and half the time that direction was opposite of how i'd already corrected those points before. In addition, the way I lined up the plastic so that it lined up with holes the closest resulted in it not being parallel with the edges, which didn't make sense either. When I lined it up with the edges of the playfield, right to the corners (where I know it should all match up), none of the holes lined up at all. So I stopped working on that until I could figure out what was going on. I measured various parts of the plastic and the wood playfield, and checked them against my CAD drawings, and they were all accurate. Then I got a t-square out to check if maybe my playfield somehow wasn't square. Nope, playfield was square. But the plastic wasn't! It had a 3/8" skew to it along its entire length. There must have been something wrong with the setup of the CNC causing it to list to the right as it moved up the playfield, so I'll need to figure that out. Never noticed in my test cuts since all of them were smaller. So that plastic is a loss for any real work. But knowing that it's wrong, I don't have to worry about fixing it the right way. So I just got out a router and adjusted all the holes by hand to line up enough. I'll reassemble the playfield on this bad plastic for now to test out the material.
Cross posted from the original Pinside thread, this is one of many posts regarding my third homebrew pinball machine, creatively nicknamed 'P3'
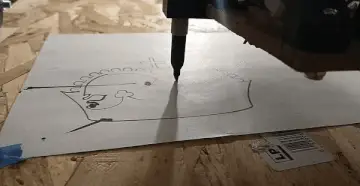
But before I can cut some new stuff, I need some drawings to cut! I took my scan of the original playfield, and converted it back into a cad drawing (what a pain!). Then I got that printed out on paper at 1![]() scale again, tore down the playfield, and laid the paper down on the playfield to verify everything, since I wasn't sure if the scans would be "square".
scale again, tore down the playfield, and laid the paper down on the playfield to verify everything, since I wasn't sure if the scans would be "square".
Sadly you can't see through paper (it would have been amazing to get this printed on something clear but as always I'm being cheap), so I had to use a small screw to search out all the holes in the playfield again for comparison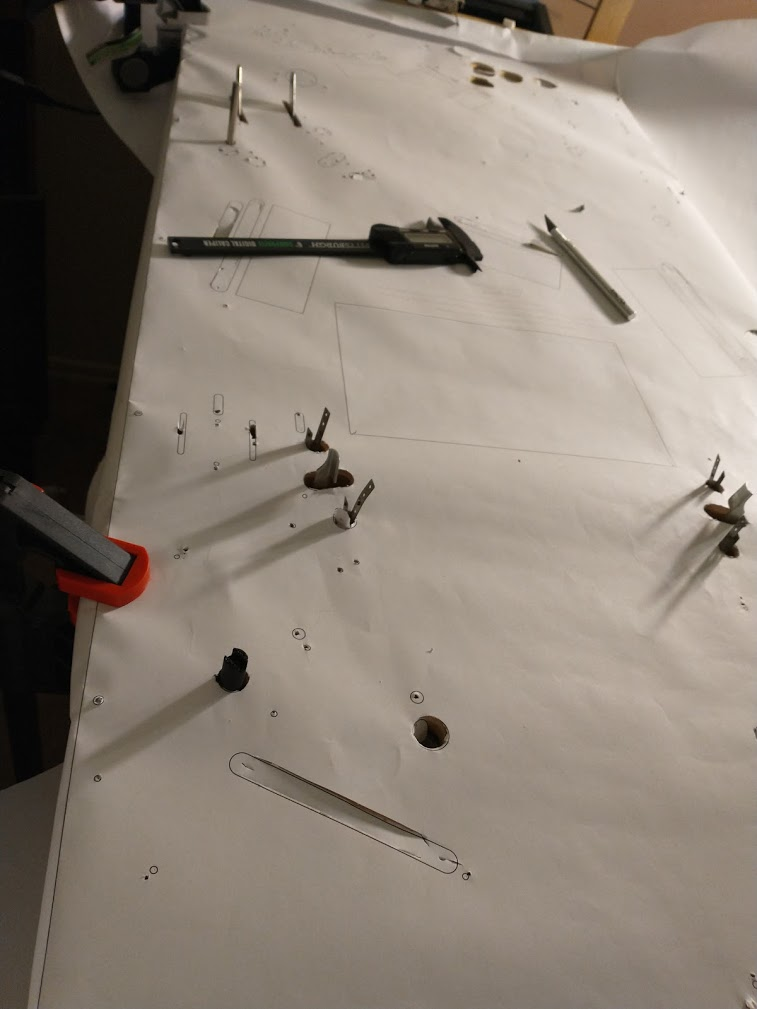
Some parts were spot on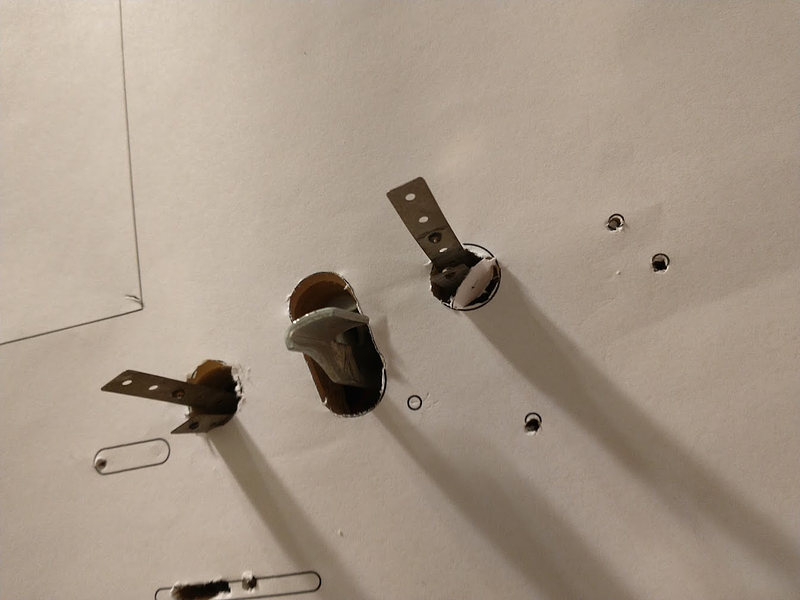
Some were off, but very consistently so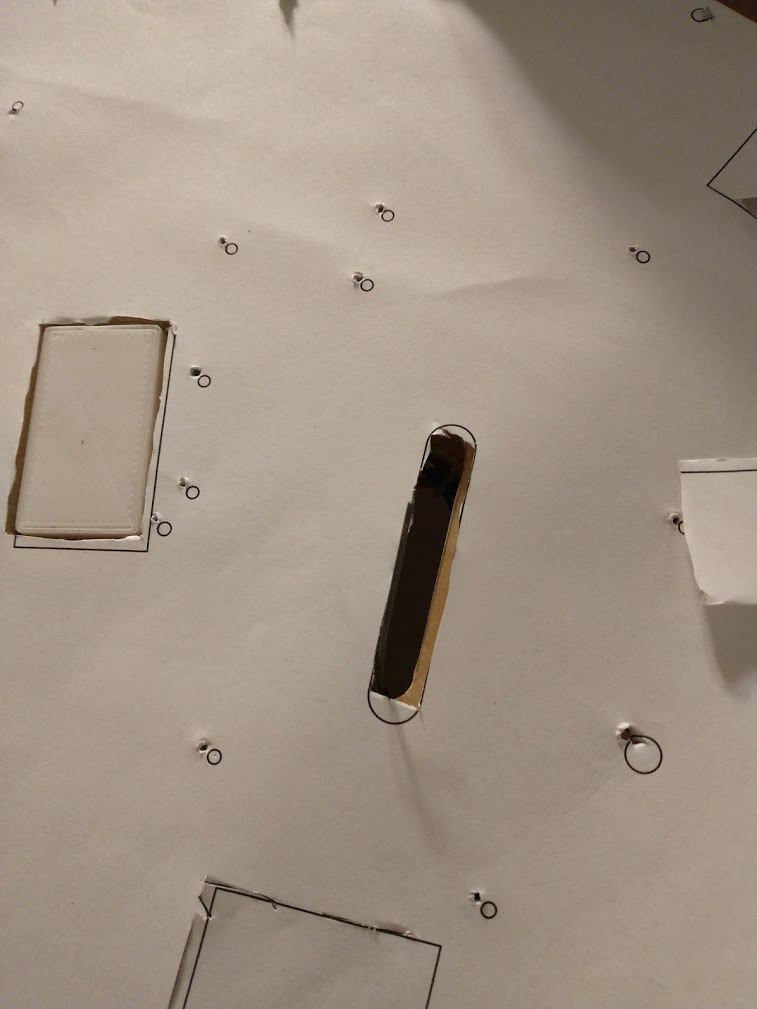
And some things were so far off I don't know what could have happened... 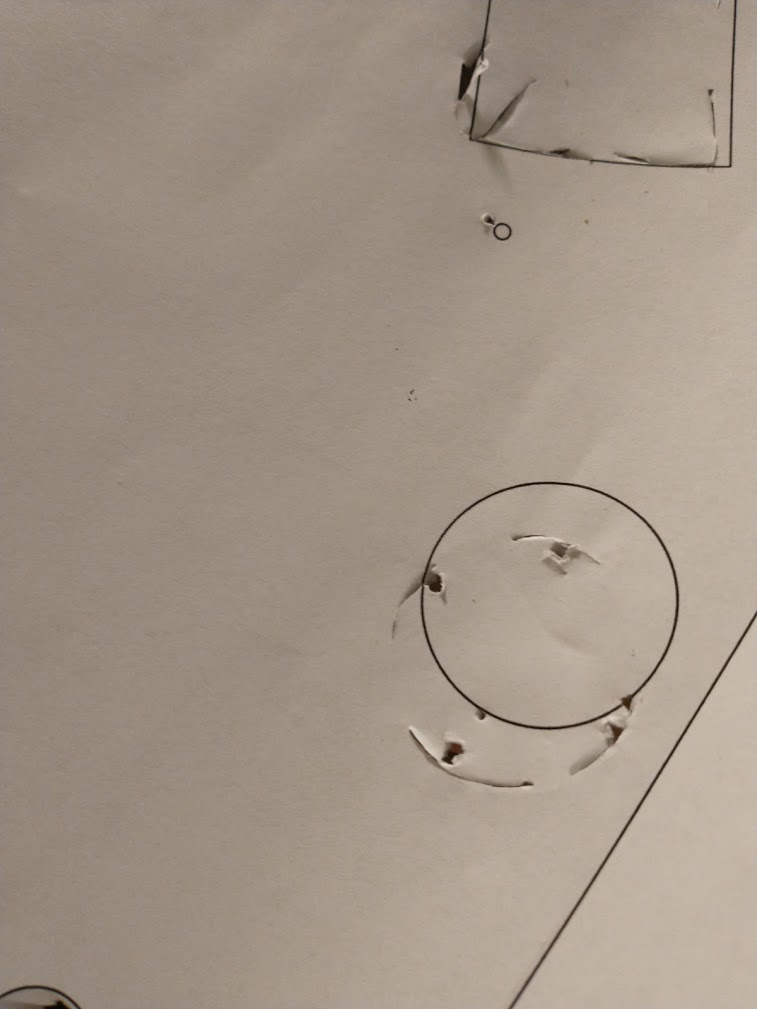
Overall, the stitching seems to have worked pretty well, but not good enough to really be a go-to thing. In the future I'll need to be more vigilant about cutting stuff exactly matching the cad, and adjusting the cad as I go when anything diverges to prevent this.
I spend most of my day off today going through every hole again and manually adjusting my cad drawing (which the paper was printed from) to account for the discrepancies, so hopefully I'm now good to go. I'd like to avoid having to get another throwaway paper printed to verify all my changes, and I've got 3 sheets of acrylic ready to go, so I'm tempted to do a few test cuts on leftover stuff, then just get cutting and see how I do. Probably not the smartest thing to do but at some point you've gotta stop preparing and just jump in, and the cost of failure is theoretically pretty low (or it would be if I could find any reliable source of plastic locally, grr)
Cross posted from the original Pinside thread, this is one of many posts regarding my third homebrew pinball machine, creatively nicknamed 'P3'
Two months of no real progress on the game, but: I've got a CNC router! 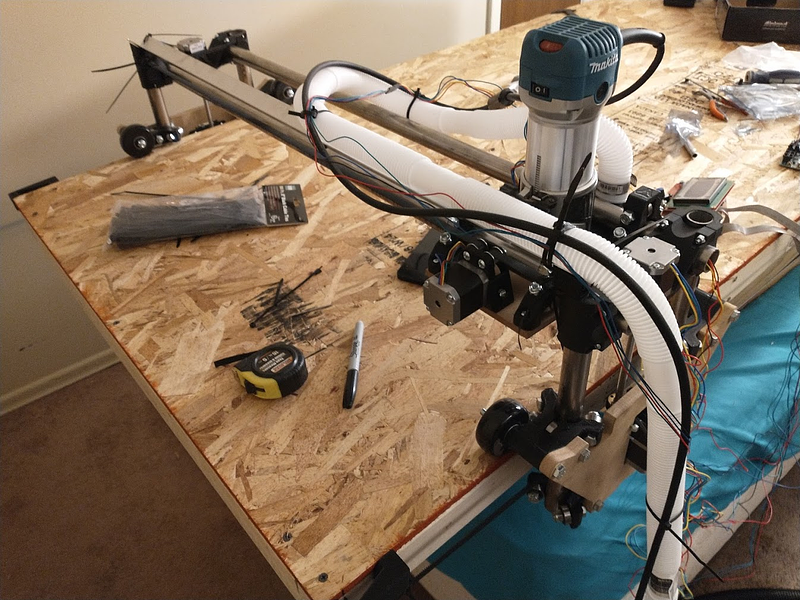
It's... currently sitting on top of the bed in my spare bedroom, because I horribly underestimated how big it would be. But that's fine, not many guests during COVID. I haven't done any really big serious work with it yet, but it seems to work fine for my small tests I've run so far, so I don't think anything should change much.
I did some test cuts using a straight edged router bit (not sure the correct term for this), which was recommended for cutting plastics (since it doesn't have a helix to pull up the material). With a spare bit of lexan, it didn't do too well, sorta ripping up the edges and melting them a bit, similar to the issues I had cutting my lexan by hand with a drill. I got a sheet of 1/16" acrylic and tried that, and it cut much better. Not perfect, but definitely presentable. The only issue is that acrylic has a tendency to crack and shatter randomly. The router bit hasn't caused any of that yet, but when doing a whole playfield it could potentially cause an issue. I also tried another scrap of plastic I had on hand (which I think is PET-G, but I didn't label it), and it cut super nice. I'm trying to source some PET-G sheets locally to test out but I haven't found anything so far, so I'm gonna go ahead and try the thicker acrylic first. Acrylic also is (supposedly) what 70s+80s games with plastic playfields used, and what other homebrews have, so I'm still hopeful it'll work.
Cross posted from the original Pinside thread, this is one of many posts regarding my third homebrew pinball machine, creatively nicknamed 'P3'
After a few multi-hour sessions with the glass on, the plastic has finally started buckling. Worse, after I left it to cool off for a day, it's still not lying completely flat again. I assume if I stripped and repopulated the whole playfield I could fix it, temporarily, but not a permanent solution...
I've been told that this method worked successfully on some homebrew pins, but using 1/16" perspex (acrylic). When I went to my local plastics shop to buy some, they recommended I use lexan instead for this application, as it shouldn't react to heat any more than acrylic and would hold up to the pinball better, but months later when I finally unboxed the sheet and measured it, it seems to be 1/32" per my calipers. So maybe a thicker sheet would work, or maybe the material is wrong. Or maybe I'm missing something else... I don't really want to hand cut another one of these after all the effort the first one took either. Maybe I'll shell out to get one laser cut, if I can get a good cad file together...
I've also ordered a CNC router (https://www.v1engineering.com/lowrider-cnc/) that hopefully I can eventually use to cut new playfields and maybe plastic sheets (or even longer term goals, I get my own laser cutting head to attach to it), so maybe I'll wait on addressing this issue for a while. Moving back to a clearcoated playfield is always an option, it'll just add a ton more complications and steps to deal with...
Cross posted from the original Pinside thread, this is one of many posts regarding my third homebrew pinball machine, creatively nicknamed 'P3'
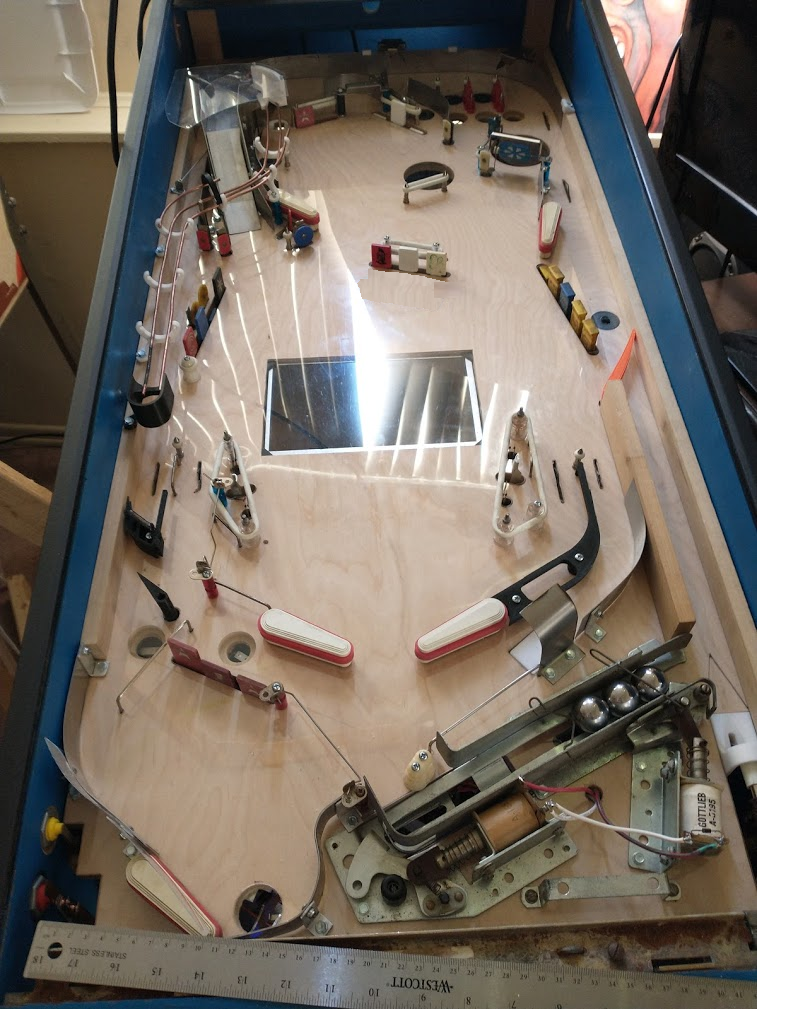
Got the playfield reassembled and have been playing a bunch of test games. No buckling on the main playfield at all. I've got a slight bubble above the upper left flipper, I think I just tightened stuff down wrong though, doesn't seem to be changing. Have to be very careful no screws are rubbing against the edges of their holes, and to attach stuff in a 'wave', to make sure the plastic lies down flat. There's a slight drop in the plastic over the screen from the weight of the ball but not enough to affect its travel or anything.
Plays much faster with the plastic compared to the paper (who would have guessed?). I'm not getting occasional airballs off the center bank, which isn't great, and some balls are flying right over the eject hole. I'll have to make some air ball guards, and might also turn down the flipper strength some, since it's a bit too much in some places. If you hit the left target on the center bank from the right flipper it rockets down the left outlane too fast to see.
While reassembling I also noticed that some of the post screws are starting to strip. Some of these should definitely be machine screws, but that can wait.. for now I'm just upgrading to longer screws, since the ones I had were only going 1/4" into the wood.
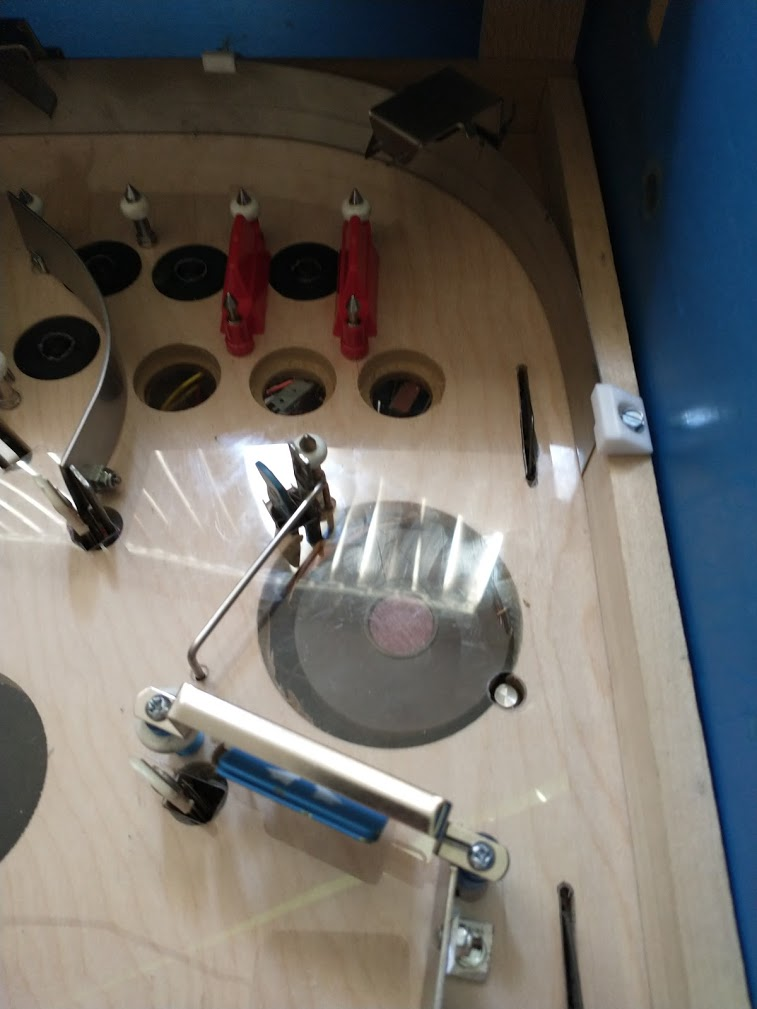
The upper magnet continues to cause me issues. Despite doing multiple tests showing that it could grab a ball from ~2.5" away with no wood in the way, it still can't pull a ball reliably off the post for some reason... It might work better if I had the post above the magnet instead of below, so it'd have more time as the ball drops, but it's probably still be sketchy. Again I wonder if having a large metal core covering this whole area would work better, or if having the magnet under just 1/32" of plastic is equivilant....
If I position the magnet at the far right, it can grab the ball 75% of the time, but it drops it too far to the right and it doesn't feed the flipper well. If I position it more to the left it feeds cleanly, but can't grab the ball. there's about 1/8" sweet spot where it mostly works, but anything can throw it off, definitely not reliable enough.
Additionally, I'm also having issues where sometimes the ball comes around the orbit so fast that it actually bends the post and gets wedged in between the post and the wood on the right, sometimes also lifting off the playfield somewhat. If I can't get the post more rigid, I'll have to abandon it since it's getting the ball suck...
Cross posted from the original Pinside thread, this is one of many posts regarding my third homebrew pinball machine, creatively nicknamed 'P3'
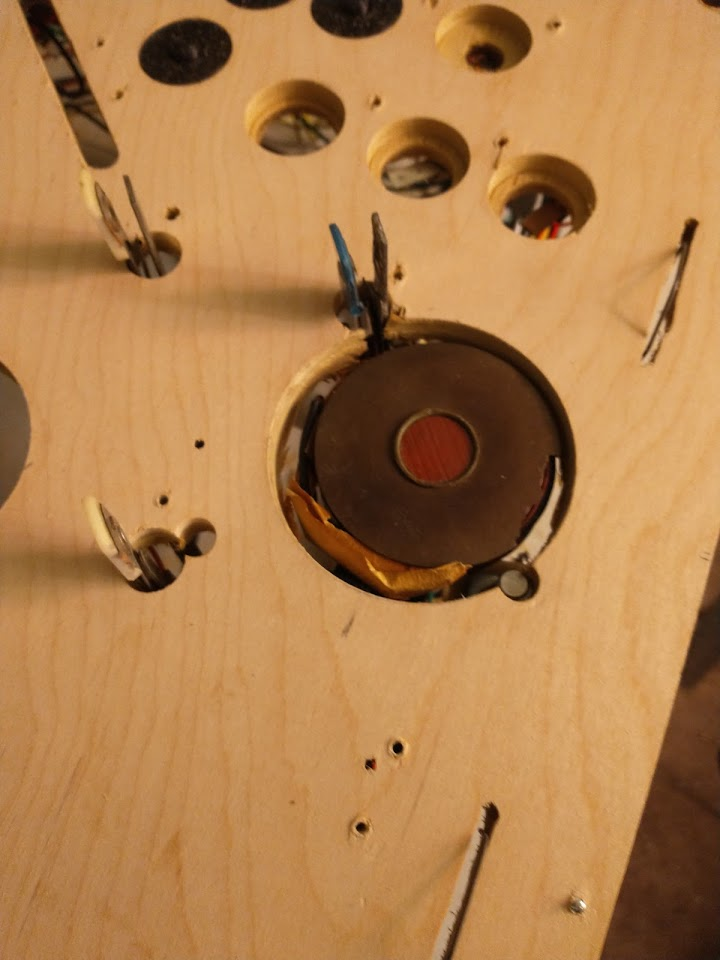
Installed the upper magnet. Needed to cut a 3" hole to fit it, but luckily that just barely left holes for the surrounding stuff that was mounted there. Right below the nearby target you can see one hole where one end of the ball guide goes, which I'm half certain is going to rip apart at some point since there's so little wood left there. Tried to design the mount to hold the magnet slightly below the surface so it won't scratch the plastic, but not sure how that'll work when the magnet is active... maybe I should cut a circle of plastic to 'float' in between them or something? I feel like overall I don't want it to be too much lower, or it may stretch the plastic or something
Cross posted from the original Pinside thread, this is one of many posts regarding my third homebrew pinball machine, creatively nicknamed 'P3'
After a lot of careful measuring, it's time.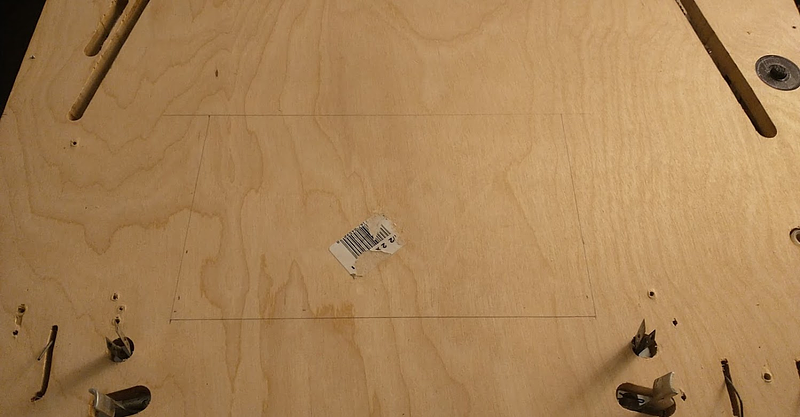
The fit I'm going for is very tight. I'm about 2mm from one of the drop target mounting points, and I'm going to need to relocate one of the slingshot switches slightly, move a fuse block, and make a custom mount for the magna-save, but, it should work.
Printed this magnet bracket, and cut a small stick of 3/4" iron for the core (I think this is the right metal...)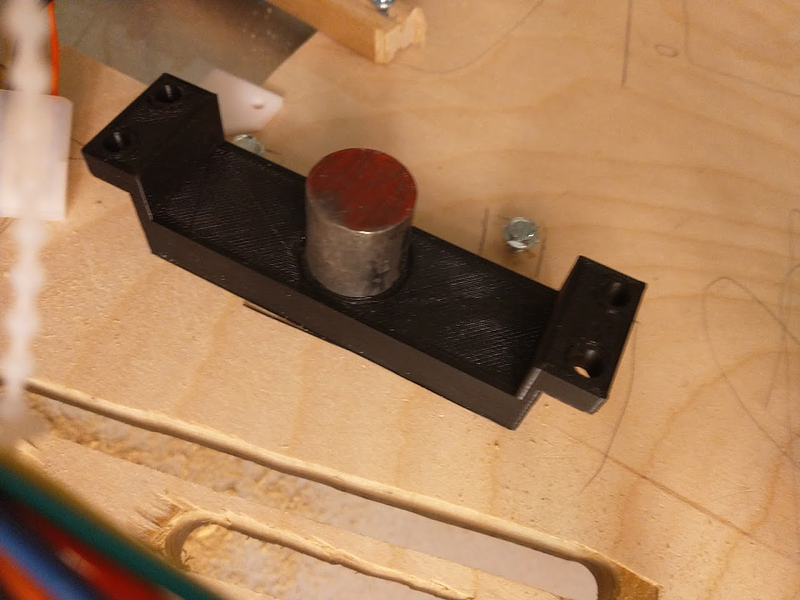
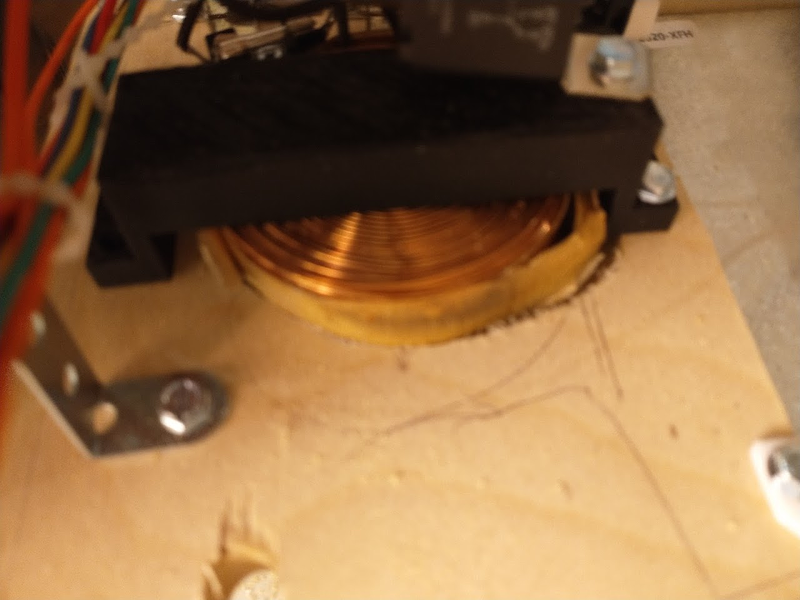
20 agonizing minutes later, I have a hole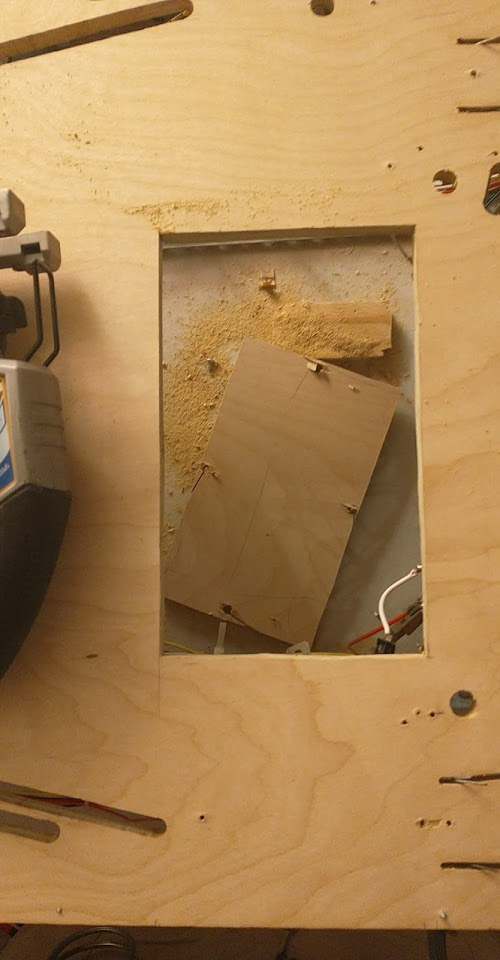
It fits! Barely. You can see the penciled outline of the drop bank on the bottom right, and the currently floating fuse block on the bottom left. I had some room to the top (left side of the playfield) I could have moved it to if necessary, but I wanted to keep it centered between the slings/flippers if possible 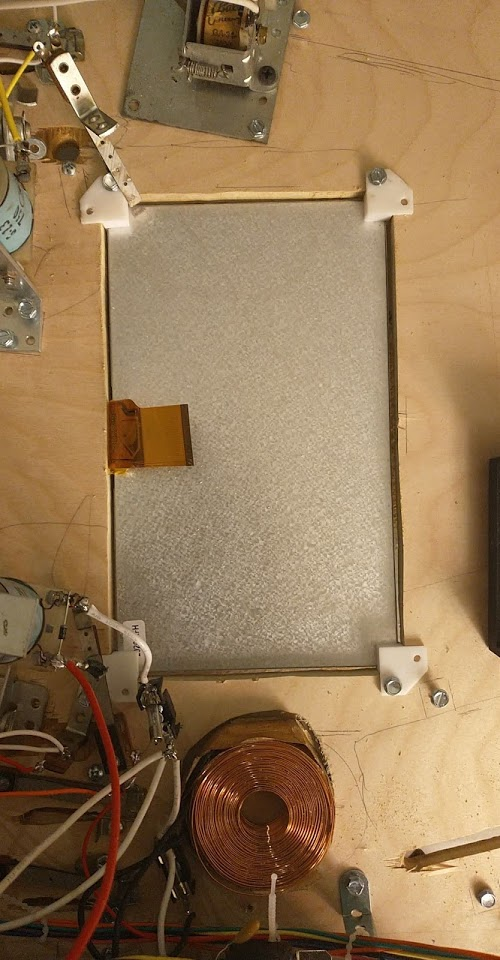
I then mount the control board very professionally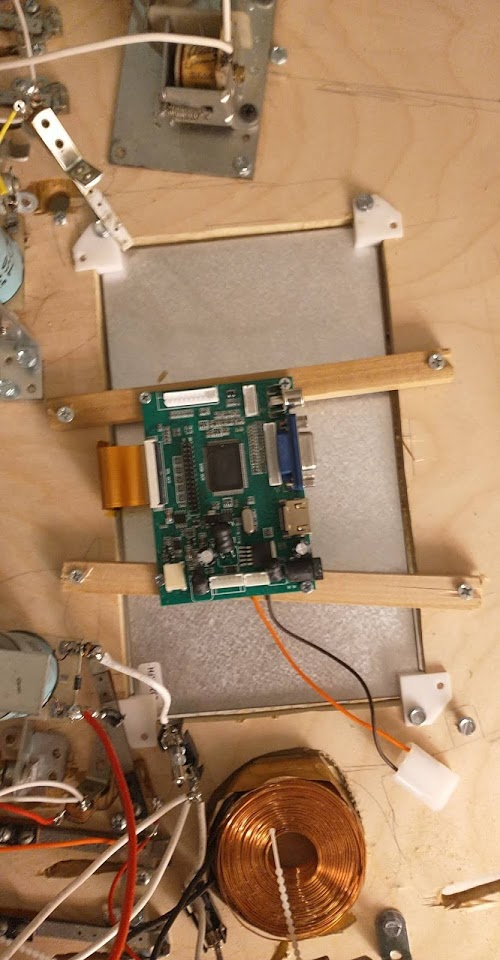 , and hook it up. Success!
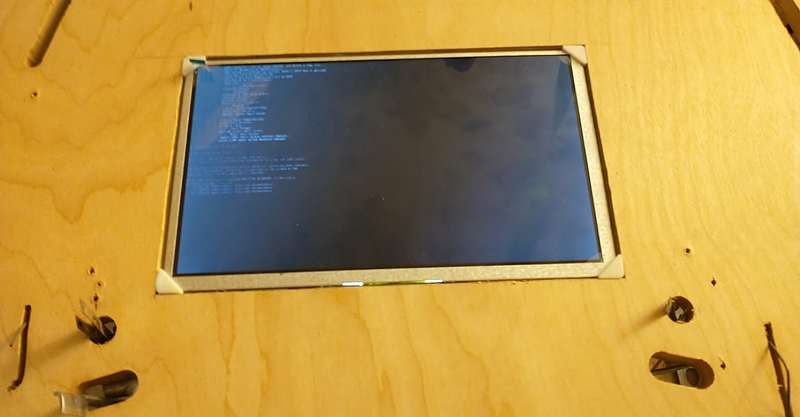
Lets get a game running... 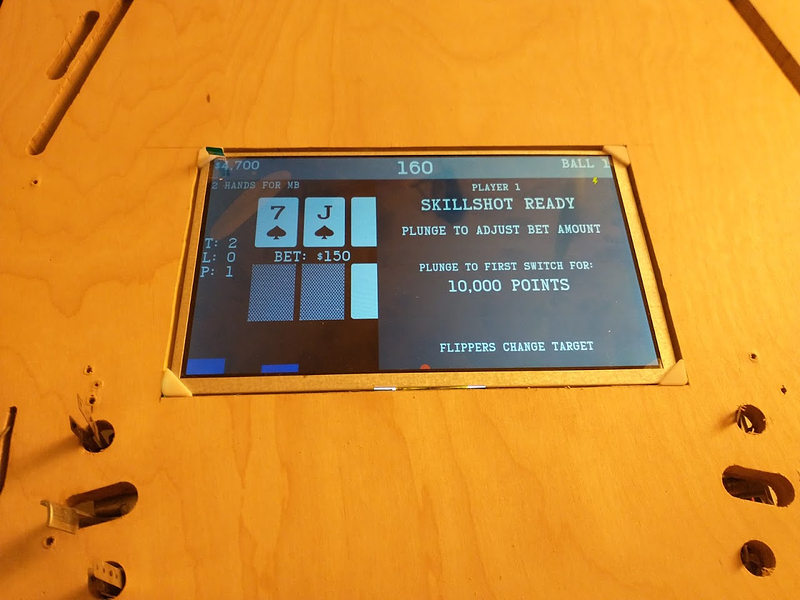
The viewing angles aren't the best but I think it should be okay. Will have to wait until I get it in the game for that though. The supports are a bit too thick and stick out of the playfield, so I'll need to space those or something. Not sure how I messed that up, thought I specifically made them slightly short :/
Cross posted from the original Pinside thread, this is one of many posts regarding my third homebrew pinball machine, creatively nicknamed 'P3'
Reassembled and dropped it in the cab again for more testing. 
Everything seemed to work fine. No mechs were sticking, no raising of the plastic anywhere. I left it sitting for a while with the transformer+electronics on in case that would trap any heat underneath, but nothing happened. I'm still quite suspicious, but I can't really think of any more testing I can do at this point, and the playfield does look so nice and shiny....
So I took the playfield back out, and disassembled the whole thing again. I'm getting very fast at this, but it's still a pain. One thing I'd try differently next time is the side rails. Currently they're under the plastic, but I think it'd be fine to have the plastic 1mm away from them. This'd save at least a quarter of all the screws I need to remove when taking the plastic off, and prevent the playfield from having time to sag while the rails are removed. Within a few hours of removing them there's a noticeable 1/4" dip in the middle of the playfield, which is more than I'd have expected, especially with all the drop target banks already removed... I assume my playfield wood just isn't as sturdy as what manufacturers use, but nothing I can do about that ![]()
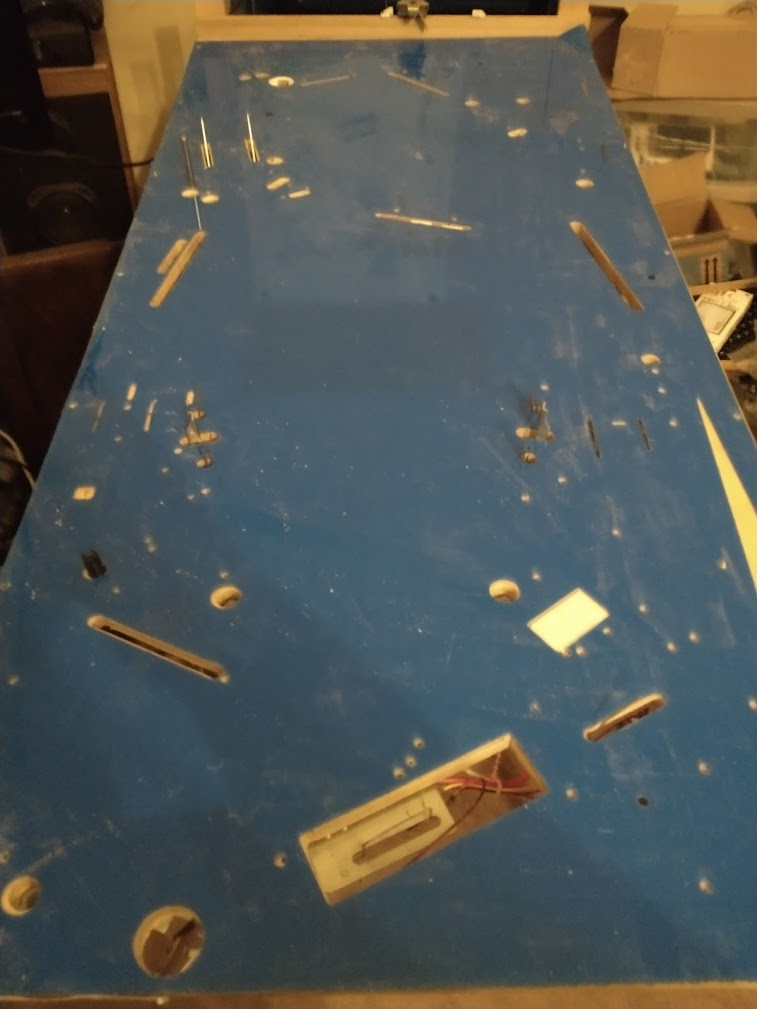
With the plastic removed and everything stripped off, I have some updates to do that I've been putting off:
- the right controlled gate for the top lanes needs to be moved about 1/2" to the left to prevent ball hangups
- the right-most upper lane needs a new rollover drilled in line with the others, since previously it only had a 'bottom' row switch
- need to add lane guides to the upper lanes so the ball doesn't fall the wrong way
- the target under the upper left flipper needs some tweaking. The hole isn't big enough to fit it through right now, so I need to extend it, and I want to reposition the guide wire below it to give a better feed
- I've removed the upper left target (it was sort of under the ramp above the upper left flipper) since it can't be hit due to the pop bumper being replaced with a rubber (it wasn't really hittable before either), so now I can make a new guide going from the upper eject hole to the upper left flipper that doesn't have a gap in it for the target, which will hopefully improve that feed.
- widen a few holes and slots slightly since some mechs would occasionally bind a bit on the edges
Once that's out of the way, I'll move on to the fun part: cutting a 10" hole in the middle of the playfield for the LCD screen. No chances to mess up horribly here, nope... ![]()
And then I can cut another 2.5" hole for the upper magnet and finally get that installed again!
Cross posted from the original Pinside thread, this is one of many posts regarding my third homebrew pinball machine, creatively nicknamed 'P3'
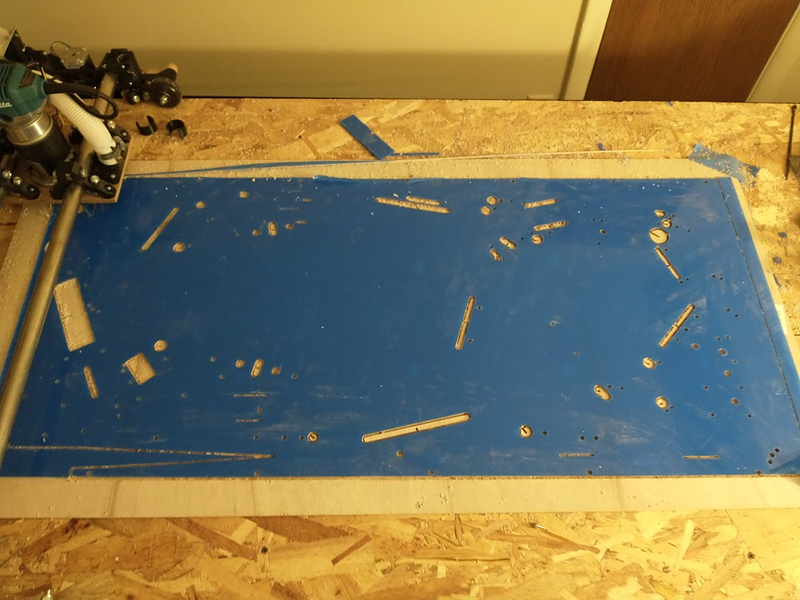
No noticeable change in the plastic after sitting all day with the lights on it, so time to dig in. I started by just making all the holes for posts, guides, etc.
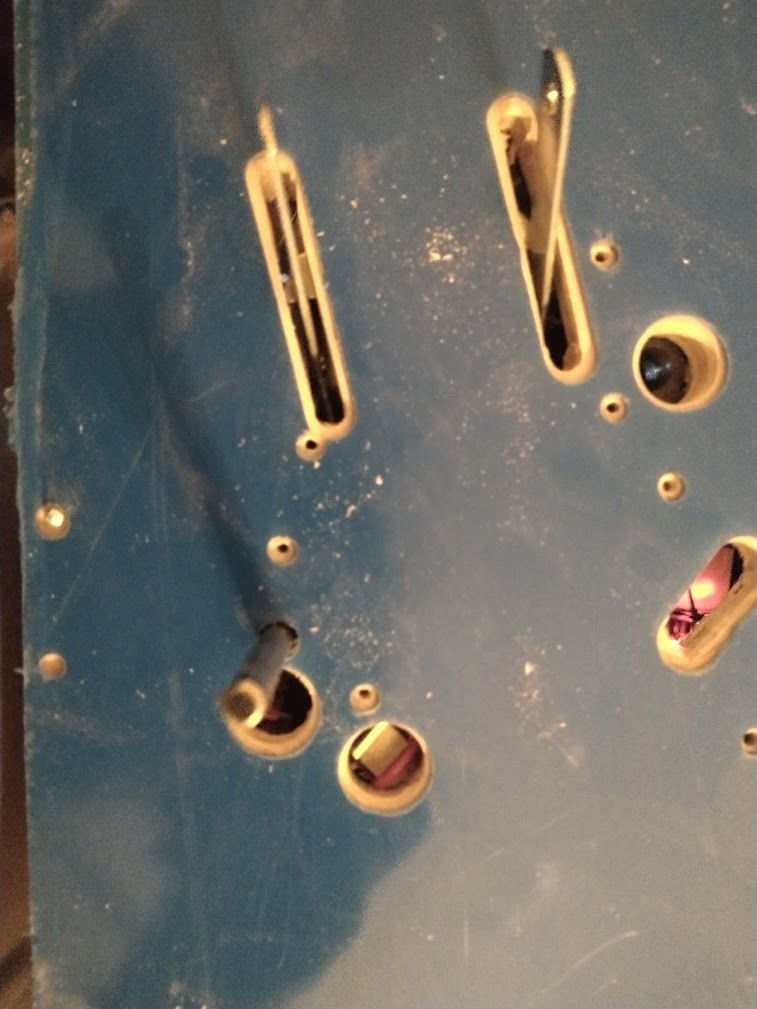
I've gotten pretty good at making clean holes, at least for smaller sizes, but for some reason they never seem to center well. Some I went to a bigger size, others I manually elongated by running the drill against one edge. 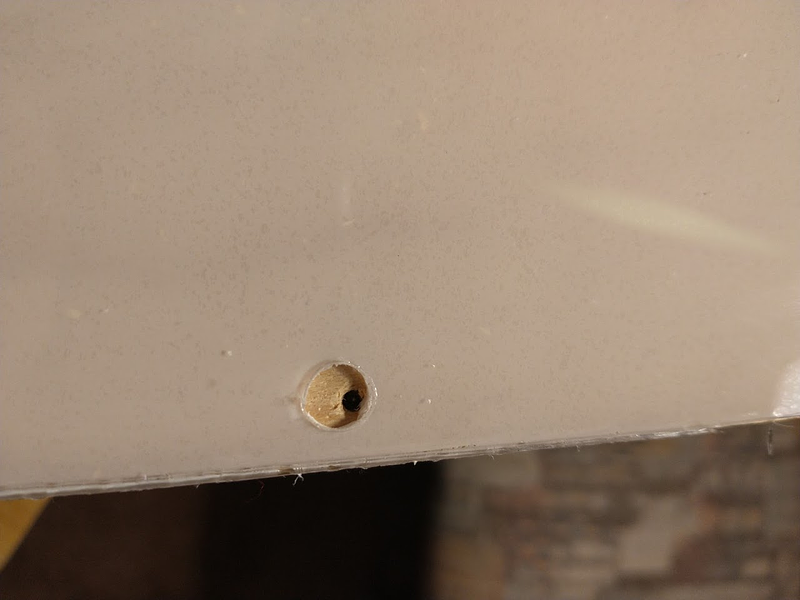
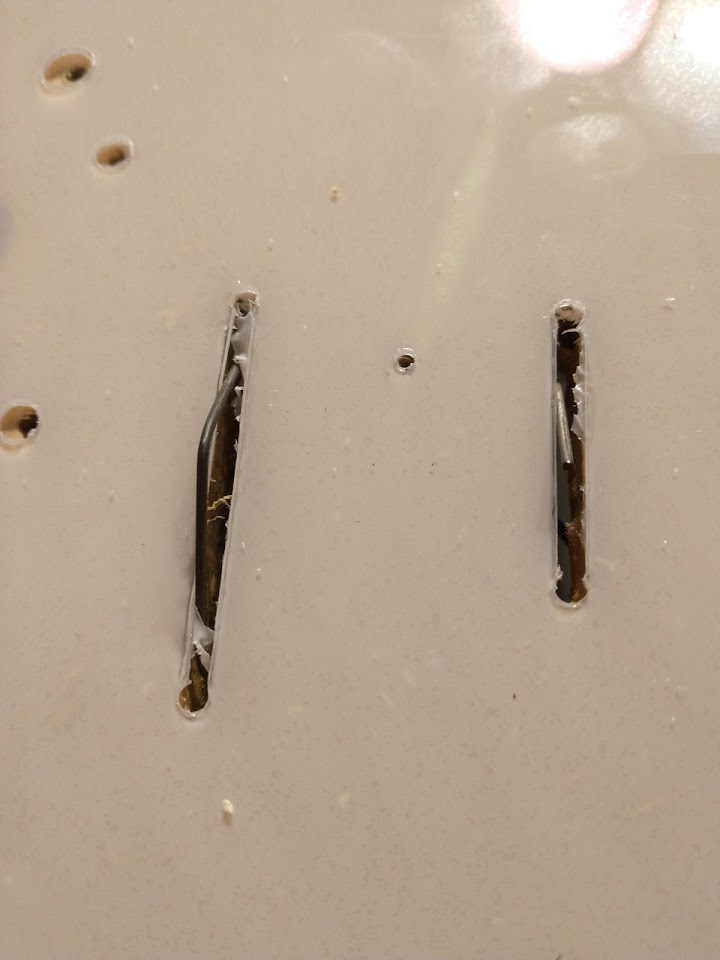
Luckily, with a new blade, making the slots and other straight lines isn't too big an issue. I score each side 3-5 times, then use a hammer to punch it out, and I get pretty clean lines (as long as I get the corners right)
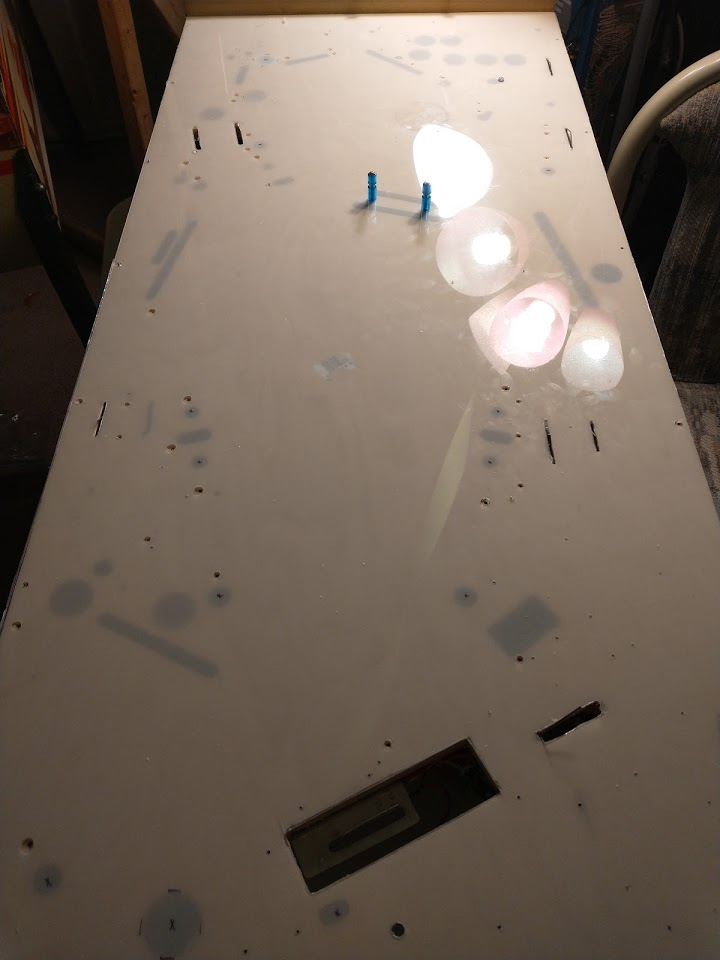
Bigger holes cause issues. Once you get to about half an inch (or even 3/8 sometimes) the bits start to chew up the plastic. Depending on how bad it is I can sometimes clean it up with a blade but it's never perfect. I wish I had a better way to do these, but no method I tried (drill, forstner bit, spade bit, etc) was perfect. It'll be fine for a whitewood, but I think I'll definitely need to get a better one of these machine cut at some point if it all works out.
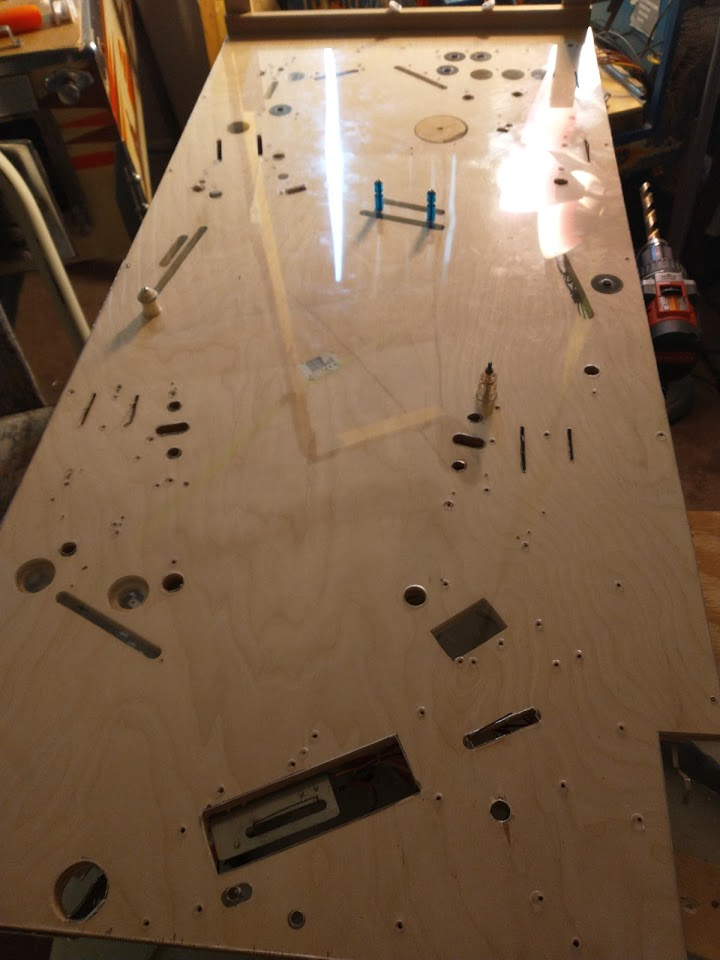
I'm finally at a point where I have most stuff cut out, enough to reassemble and playtest the game to see how everything works. I've skipped some of the guides, the drop target banks (since they're removed right now anyway), etc.
